")
If you just found out you’re going to be a new ESL teacher, whether this is your very first teaching job, you’ve just been reassigned, or you walked into a contract and thought “wait, what do I actually do first?” – this post is for you.
I remember that feeling. The mix of excitement and panic. The wondering if you have what it takes to support kids who are navigating a new language, a new school, and sometimes a whole new country.
Here’s what I wish someone had handed me: a simple, honest, week-by-week plan for your first 30 days as a new ESL teacher. Not a list of everything you could do. A clear plan for what to actually do first, so you walk into that classroom feeling prepared instead of overwhelmed. Let’s take it one week at a time. Don’t have time for details? There is a helpful checklist at the bottom!

Before Week 1: What to Do Before Students Arrive as a New ESL Teacher
Get your student list as early as possible
Before you can plan anything, you need to know who you’re teaching. Ask your administrator or ESL coordinator for a student roster that includes:
- Grade level and classroom teacher – especially important if you push in or pull out
- English proficiency level – even a general beginner/intermediate/advanced designation helps you plan
- Home language – knowing this helps you prepare a few words of welcome and find any bilingual support materials
- How long they’ve been in the country – a student who arrived last week needs different support than one who has been in school for two years
If this information isn’t available before school starts, don’t worry and know that you may get new students too, but if you do have access to this information as you get ready, it can be helpful.
Set up your physical space intentionally
You don’t need a Pinterest-perfect classroom. You need a space that tells students the moment they walk in: you are safe here, and I thought about you before you arrived.
The five things I prioritize before students arrive:
- Label materials with real photos – to help students find what they need
- Post a visual schedule – even four pictures showing the flow of your class period can reduce newcomer anxiety
- Create a word wall space – it can start completely empty. You can build it with students.
- Set up your seating thoughtfully – seat newcomers near kind, verbal peers who will model without taking over
- Prepare one “day one” activity that requires zero English to participate – drawing, sorting, or a simple game
(For a full classroom setup guide, read ESL Classroom Setup: 5 Things to Do First)
Gather your go-to supplies
You don’t need everything at once, especially as a new ESL teacher! Start with these five things and build from there:
- Dry erase pockets and markers – turn any printable into a reusable activity
- Individual crayon sets with storage boxes – independence from day one
- Scissors and glue sticks – cut-and-sort activities are gold for newcomers
- A bin and plastic folders – one per student, organized by class
- Anchor chart markers and sticky easel paper – to make charts with your students, and move around as needed
(See my full supply list with exactly why each item works for ESL students: Essential ESOL Classroom Supplies)
Week 1: Connect Before You Teach

Your one and only job this week: learn your students
Seriously. Resist the urge to jump into curriculum. The single most important thing you can do in week one is learn who your students are – their names, their stories, their strengths, and what makes them feel safe.
Everything else builds on this foundation. A student who feels known by their teacher takes language risks. One who feels invisible shuts down. The first week for you as a new ESL teacher and your newcomers is entirely about belonging.
Start with names — the right way
Learn every student’s name before the end of day one. Not a version of their name. Their actual name, said the way they say it.
If you’re unsure, ask warmly: “I want to make sure I say your name the right way – can you say it for me?” Repeat it back. Ask if you got it right. Still having trouble- record students so you can practice privately if you need to.
Name activities that help:
- Songs and chants with names- low stakes, high memory, surprisingly effective at every grade
- Read-alouds (The Name Jar, Alma and How She Got Her Name, My Name is Sangoel)
- Name art – bubble letters, watercolor names, acrostic poems
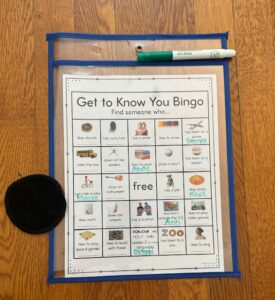
- “Find Someone Who” bingo — students learn each other’s names while practicing speaking
(Full guide: Names Activities for the ESL Classroom)
Use structured getting-to-know-you activities
Don’t rely on open-ended “tell me about yourself” prompts in week one — these are actually very hard for English learners and can feel exposing for students who are still finding their footing.
Instead, use structured activities with visual support and sentence frames built in:
- Speech bubbles — students practice asking and answering simple questions (“What is your name?” / “My name is ___”)
- All About Me pages with picture support – drawing is always a valid response
- “Find Someone Who” bingo – students move around the room, talk to classmates, and write names in squares. Speaking practice disguised as a game.
By the end of week one your students should know each other’s names, have shared something about themselves, and have a piece of their own work displayed in your room.
(Full week-by-week lesson plan: ESL Getting to Know You Activities)
Week 2: Establish Routines and Expectations
Teach your routines before you teach your curriculum
Routines are the invisible structure that makes everything else possible. For multilingual learners who are processing enormous amounts of new input every minute of the school day, predictable routines are a lifeline. When students know what comes next, they can focus their mental energy on language – not on figuring out what’s happening around them.
The routines to establish in week two:
- Arrival routine: What do students do when they walk in?
- Asking for help: Do students raise their hand? Give a non-verbal signal?
- Transitions: A consistent signal (chime, countdown, clap pattern) paired with a visual cue gives newcomers a heads-up before transitions happen
- Cleanup and dismissal: Model and practice so the end of class isn’t chaotic or rushed
Pro tip: Take photos of your actual students doing each routine and use those as your visual cue cards. Students love seeing themselves, and real photos of real kids in your actual classroom are far more meaningful than clip art.
Introduce sentence frames for classroom language
Before jumping into content-area vocabulary, make sure students have the language they need to function in your classroom. These are sometimes called “survival phrases” and they’re worth explicit teaching time:
- “May I use the restroom?”
- “I need help.”
- “I don’t understand.”
- “Can you repeat that?”
- “How do you say ___ in English?”
Post these visually. Model them yourself. Role-play them with students so they can use them confidently in their classrooms.
Week 3: Assess Informally — No Formal Tests Yet
Watch, listen, and take notes before you test anything
Week three is for gathering information about where your students are. You may have to help with school wide assessments or language screeners. Help your students to feel comfortable. If you can, use these informal assessment strategies:
- Observe during activities – who is speaking? Which students are listening but not speaking yet?
- Anecdotal notes – keep a simple clipboard or sticky note system and jot what you notice during activities.
- Writing samples from your getting-to-know-you activities – even a drawing with one labeled word is data
- One-on-one conversations – pull students aside during independent work time for a simple two-minute check-in. Ask them to name things in a picture, tell you about their drawing, or repeat a sentence frame. Low stakes, high information.
What you’re actually looking for
You’re trying to answer a few basic questions for each student:
- Can they communicate basic needs in English?
- Do they understand simple directions with visual support?
- Are they able to produce any written English independently?
- What is their home language and do they have any home language literacy?
- Are they making connections with other students?
That information helps shape what you’ll do in week four and beyond.
Week 4: Begin Teaching - With Scaffolding Built In
Now you’re ready to start your first real unit
By week four you know your students’ names, you’ve built connection, your routines are running, and you have a sense of where everyone is. Now you can teach, and you can do it confidently because you’ve done the relationship work that makes everything else possible.
As you plan your first unit, keep these principles in mind:
- Always include visual support. Every lesson, every day. Real photos, anchor charts, picture vocabulary — visuals make content accessible to students at every proficiency level simultaneously.
- Use sentence frames for speaking and writing. Don’t assume students know how to structure a response in English. Give them the frame and let them fill it in. Differentiate by level: beginners get “I like ___.” Intermediate students get “I like ___ because ___.” Advanced students get “In my opinion, ___ is important because ___ and furthermore ___.”
- Build in movement and games. Sitting and listening is the hardest mode for language learners. Speaking games, card sorts, partner activities – these are not extras. The more students use English in low-stakes ways, the faster they grow.
- Plan for multiple proficiency levels in every lesson. You will almost certainly have beginners, intermediate learners, and more advanced students in the same group. Design activities with layers- a simpler and a more complex version of the same task – so everyone is supported and challenged.
(For speaking games and activities that work across proficiency levels: ESL Classroom Resources)
The Things No One Tells a New ESL Teacher
You will feel like you don’t know enough. That’s okay.
Every new ESL teacher feels underprepared. The field is vast – linguistics, second language acquisition theory, cultural responsiveness, differentiation, family engagement, legal compliance – and no one comes in knowing all of it. You will learn as you go. Your students will teach you at least as much as you teach them.
What matters more than knowing everything is showing up consistently, learning your students as individuals, and being willing to try things, reflect, and adjust.
Your relationship with classroom teachers matters
If you pull out students or push in to classrooms, your relationship with general education teachers is one of the most important professional relationships you’ll have. A few things that help:
- Communicate proactively – tell classroom teachers who your students are, what proficiency level they’re at, and what supports work best. Don’t wait for them to ask.
- Be a resource, not a critic – if a classroom teacher is doing something that isn’t working well for ELL students, approach it as a collaborative problem to solve, not a failing to point out
- Share your expertise generously – the more classroom teachers understand about language acquisition and multilingual learners, the better the whole-school experience is for your students.
- Your students are doing something extraordinary
Learning a new language while simultaneously keeping up with grade-level content in that language is one of the hardest cognitive tasks a human being can do. Your students are doing it every single day. On the days when progress feels slow, remember that.
And on the days when a student who hasn’t spoken in three weeks suddenly raises their hand – and you will have those days – there is nothing quite like it.
Your First 30 Days: A Simple Checklist for New ESL Teachers
Before week 1:
- 🔲 Get your student roster with proficiency levels and home languages
- 🔲 Set up visual supports, labels, and a visual schedule
- 🔲 Prepare your supplies and a day-one activity that needs no English
Week 1:
- 🔲 Learn every student’s name — the right way
- 🔲 Do getting-to-know-you activities with visual and speaking support
- 🔲 Display student work and is you can, student photos
Week 2:
- 🔲 Teach and practice arrival, help-asking, and transition routines
- 🔲 Introduce survival phrases and post them visually
- 🔲 Reach out to at least one classroom teacher
Week 3:
- 🔲 Gather informal assessment data through observation and conversation
- 🔲 Take anecdotal notes on each student
- 🔲 Identify which students need the most immediate support
Week 4:
- 🔲 Begin your first unit with visuals, sentence frames, and movement built in
- 🔲 Differentiate based on what you have learned so far
- 🔲 Celebrate with your students (doesn’t have to be fancy-can just be a fun chant you make up about the group)
New ESL Teacher? Resources to Get You Started:
Everything in this post connects to ready-to-use resources in the ESL Teacher Life TPT store — designed specifically for multilingual learners with real photos, low prep, and differentiated support built in. Here are the best starting points:
- Back to School ESL Activities Bundle — everything you need for the first weeks in one place
- ESL Getting to Know You Activities — day-by-day first week lesson plan
- Names Activities for the ESL Classroom — songs, read-alouds, name art, and more
- Back to School Icebreaker Activity — the Find Someone Who bingo game
- ESL Classroom Setup Guide — what to set up before students arrive
- Essential ESOL Classroom Supplies — the supply duos I reach for every year
- Newcomer-Friendly Classroom — specific tips for supporting brand new arrivals
You’ve got this. Your students are lucky to have a teacher who cared enough to look this up.
Come find me on Instagram and TikTok where I share real classroom photos, honest tips, and the kind of behind-the-scenes stuff they definitely don’t tell you in your credential program. Have specific questions as a new ESL teacher? Come on over and message me with your questions. Until then-
Happy teaching,
Beth